How to Install a specific macOS version to an Intel based device
When you are validating macOS updates on Intel-based Macs, a one-way upgrade can slow down testing, limit reproducibility, and make it harder to roll back cleanly. What many teams do not realize is that you can use Apple’s full macOS installers and a bootable USB drive to reliably reinstall a specific macOS version that your Intel hardware supports. In this guide, Bryce Carlson walks through how to use the softwareupdate tool and a bootable installer to wipe and restore Intel-based Macs to a targeted macOS version so you can rerun scenarios, reproduce bugs, and standardize your testing workflows.
Use the steps below as your repeatable playbook for installing a specific macOS version on Intel-based devices.
The macOS Update Myth
It is sometimes thought that once a macOS device has been updated, it cannot be used to test that same OS version or OS update again. That is not always the case. Apple publishes full macOS installers on its content delivery network (CDN). These installers can be made into bootable USB drives for both Intel and Apple silicon devices; however, restoring Apple silicon via DFU is typically much faster, if you have that option.
These full installers are available via the softwareupdate command-line tool and can be used on Intel-based devices as long as the hardware originally shipped with, or was released after, the macOS version you are attempting to restore. Versions released before the device hardware shipped will not work with this process.
When testing OS updates this can be hugely helpful as you could test an update from say macOS 15.0 to macOS 15.1 and then wipe and restore back to macOS 15.0 so you can test the same thing again with different parameters or workflows.
Notes before you proceed:
- This will wipe the Apple device clean all data will be lost on device
- Activation Lock should be disabled before doing this
- Find My Device consumer iCloud features will also need to be disabled
- The process takes ~35 mins. to 1.5 hours depending on broadband speeds and device age
- You will need a USB drive of at least 20 GB and it will need to be GUID partition table set and HFS+ or APFS formatted. Under this bullet are links on how to get a USB drive formatted like that on macOS.
To get your desired installer start by running this command to list the installers you can download:
sudo softwareupdate –list-full-installers
Note: Older devices will see older versions than new hardware
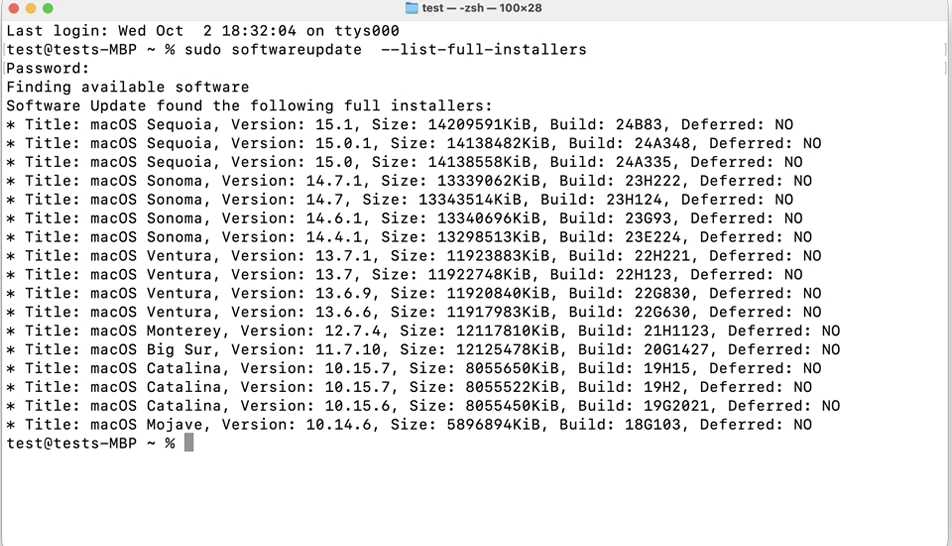
softwareupdate listing available versions
Once you find the version you need you can download that via the fetch installer command so you can use that to restore to that OS version for your Apple device. Note: Sometimes minor supplemental versions (EX: 15.7.2 (the .2 part being the supplemental)) fail to download, if that happens shoot for a major DOT minor version (EX: 15.7.0).
sudo softwareupdate –fetch-full-installer –full-installer-version 14.7
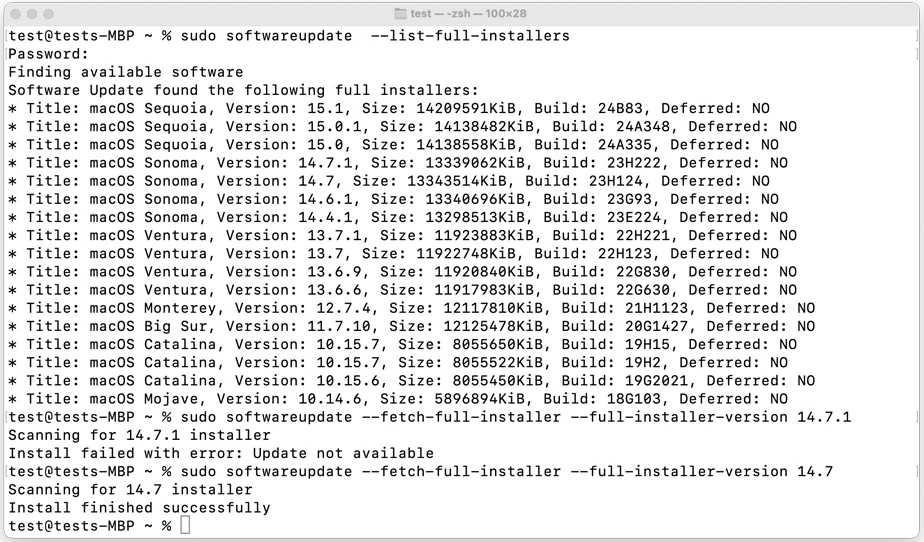
softwareupdate listing available versions and showing a download done
With the OS installer downloaded you can now run the command to make your USB drive into an OS installer. Examples of these commands can be found at this Apple KB: Create a bootable installer for macOS – Apple Support
Once you have the terminal command input to create the bootable drive it will format the USB (so make sure you have it cleaned off) and copy the data over.

createinstallmedia binary formatting the drive

createinstallmedia binary making the installer volume
Once the drive is created you can boot up your Intel Mac while holding the option key. This will allow you to see your new bootable volume you just made.
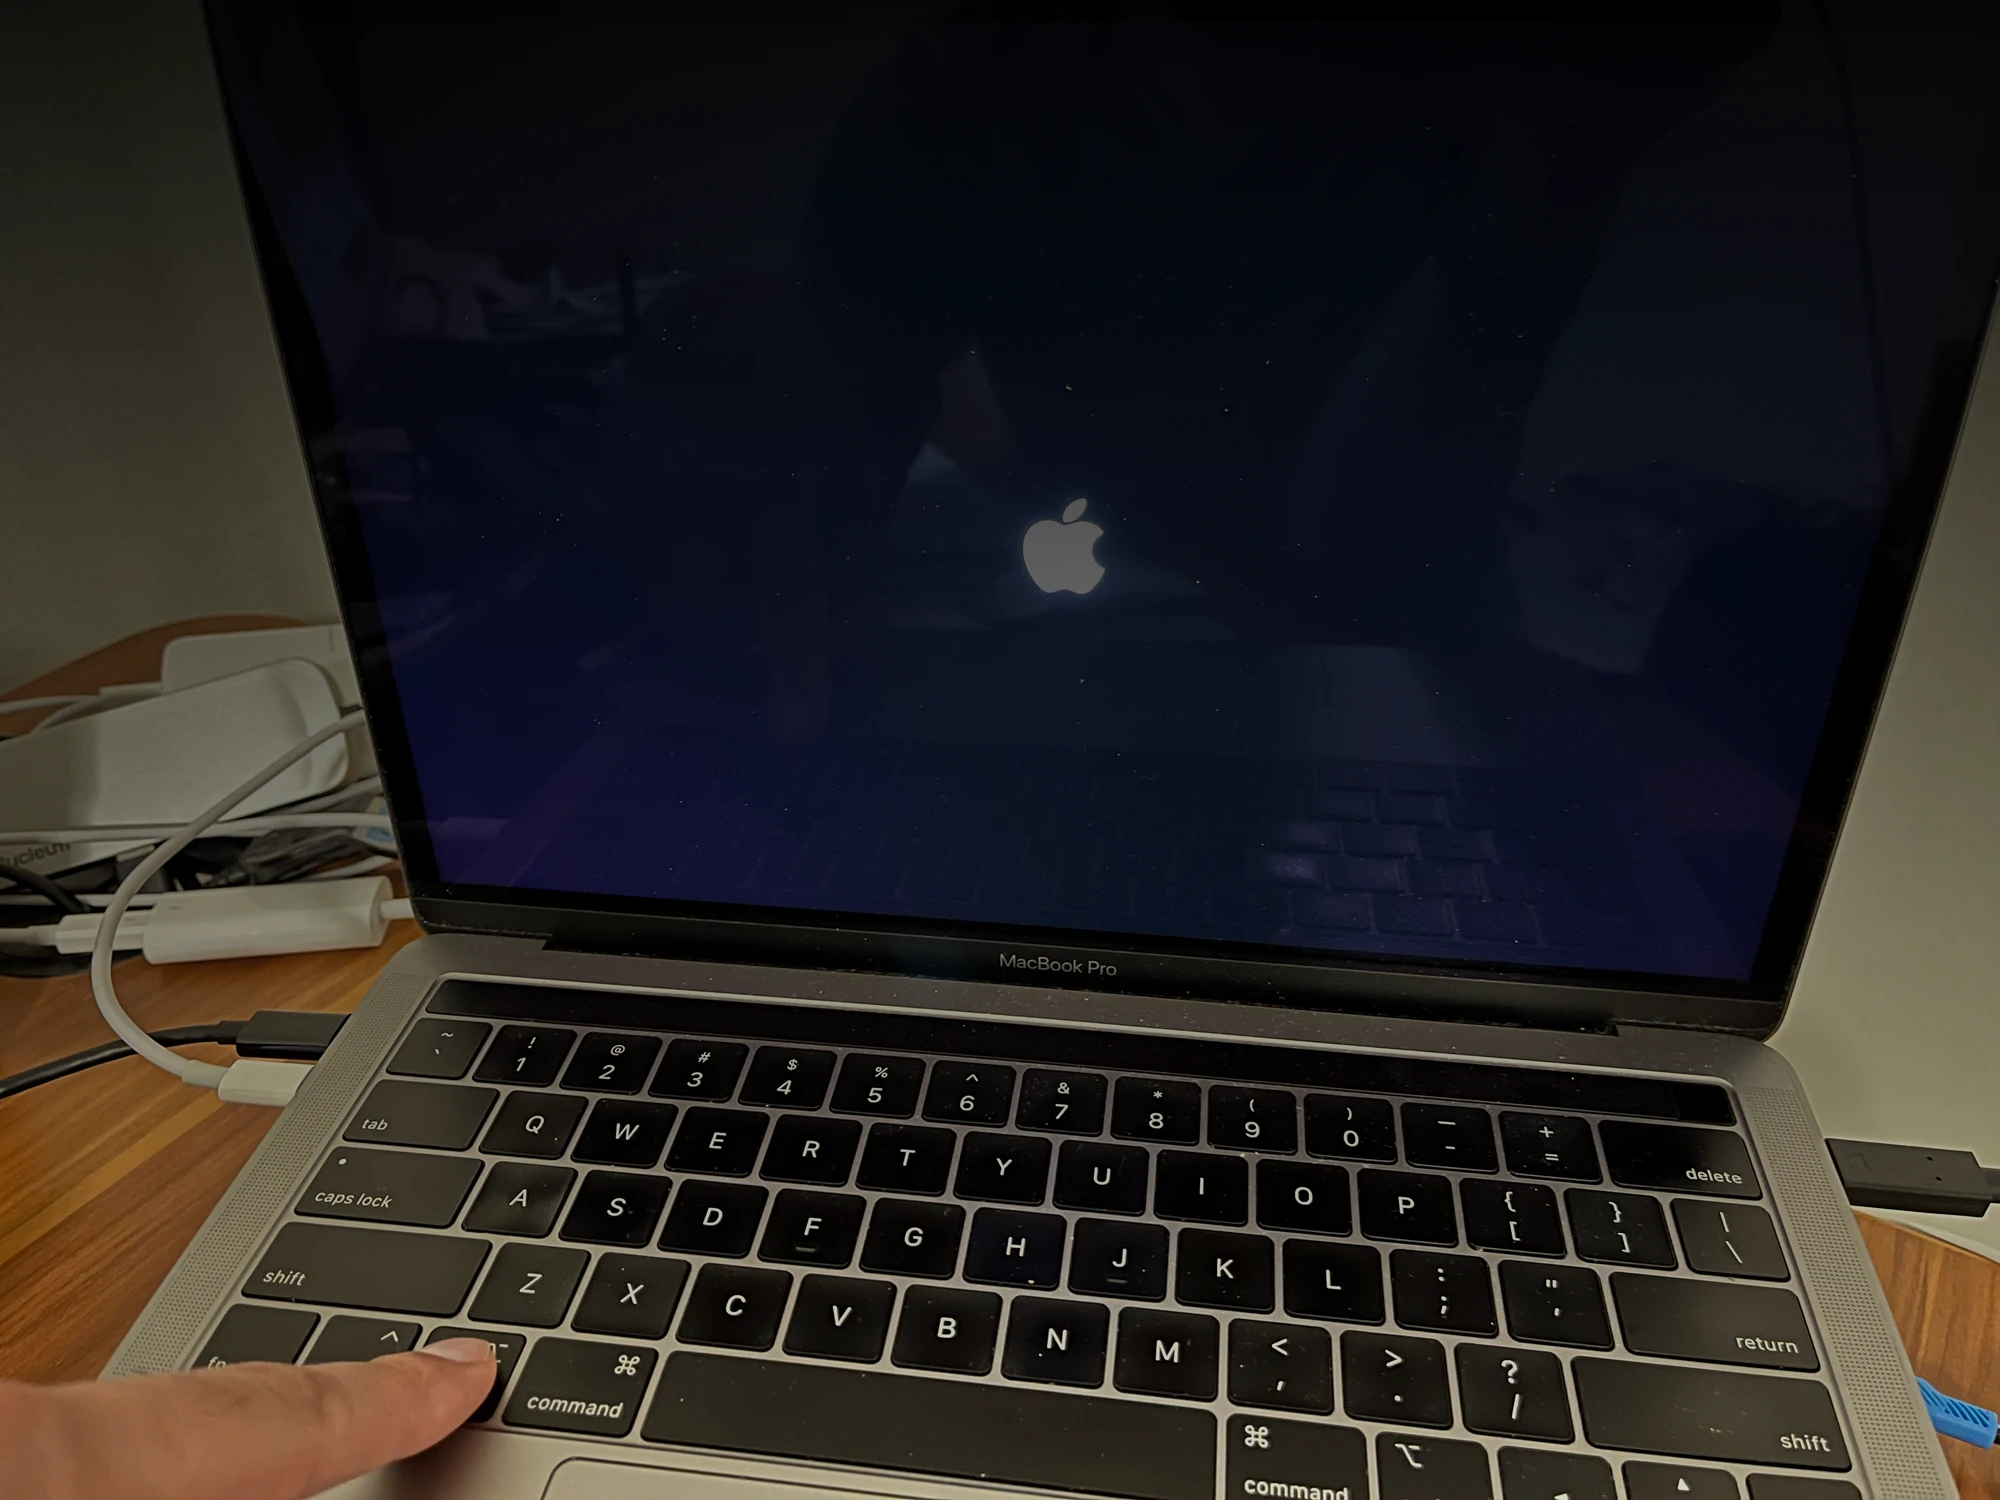
Boot holding down the option key, keep holding till the boot picker shows
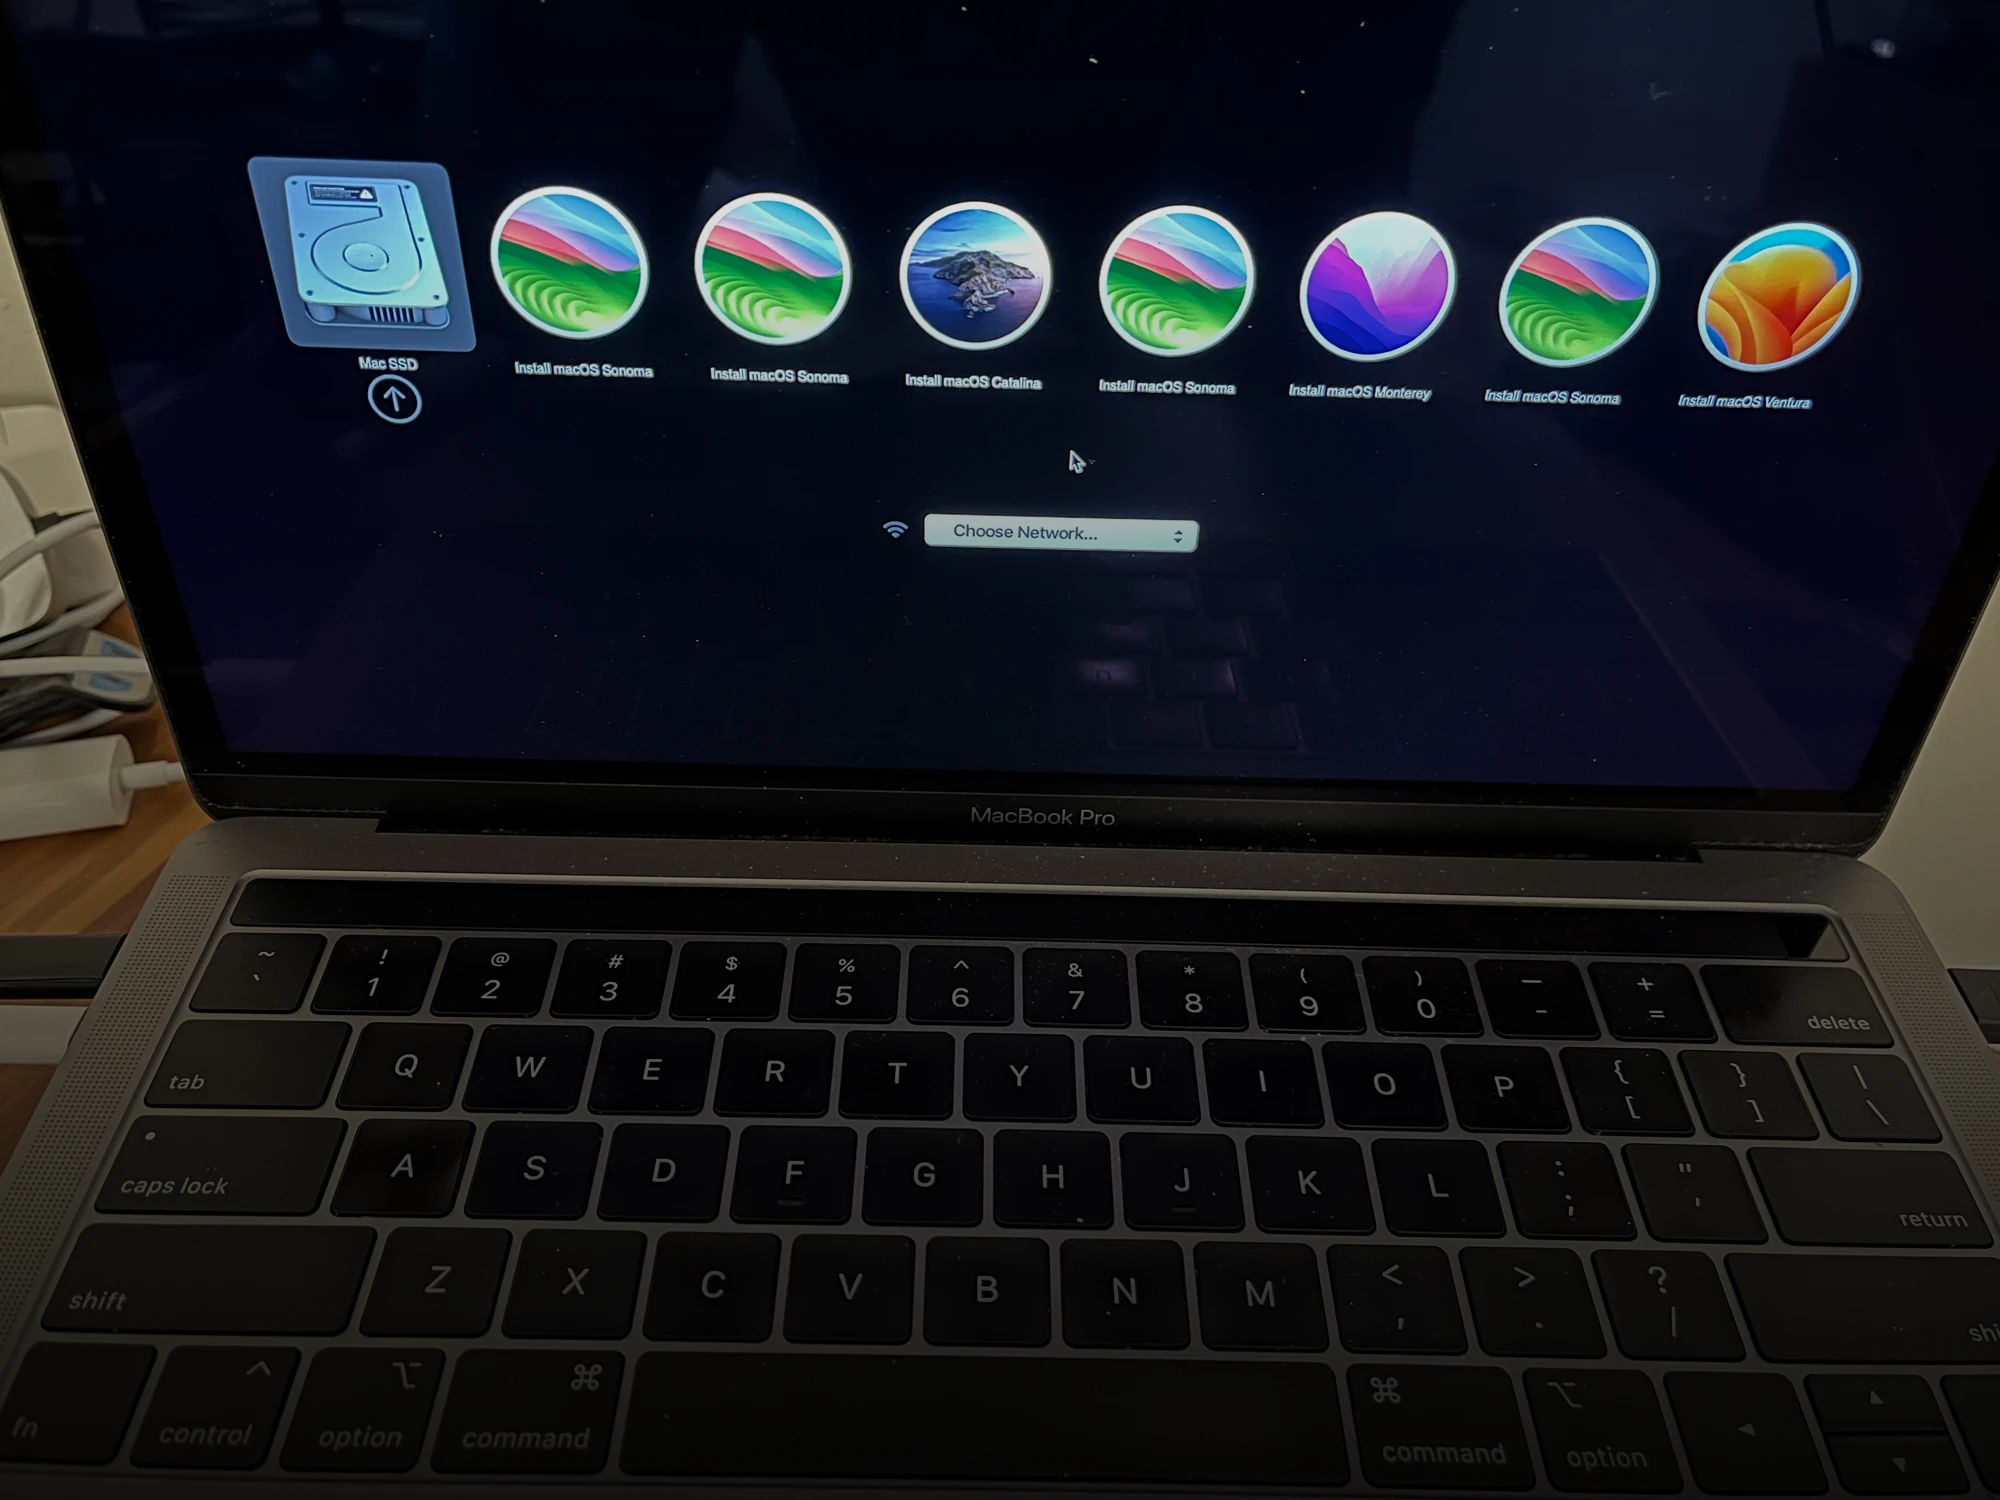
Select the OS volume you want to restore with.
NOTE: This example shows a USB drive with MANY partitions and OS options. If you only made 1 the internal drive and the USB drive will only show.
After this point you can run macOS recovery as normal, but FIRST format the drive as this will allow you to ensure a clean install.
Apple KBs on recovery:
NOTE: This will wipe the device clean. This is a full reset and wipe not just a downgrade or restore point.
With the clean install running the device, you will be good to go after the install finishes and reboots to Setup Assistant.
The Final Word on macOS Installs for Intel-based devices
Being able to move an Intel-based Mac from macOS 15.0 to 15.1 and back again on demand turns OS upgrades from risky one-way changes into controlled, testable events. By combining Apple’s full macOS installers with a bootable USB drive, your team can repeatedly return devices to a known-good baseline, validate upgrades, and confidently reproduce complex issues across environments.
To get the most value from this workflow:
- Make this process part of your standard operating procedure for macOS release and regression testing.
- Turn the commands and steps above into an internal runbook or checklist and share it with your platform, QA, and support teams.
- If you also manage Apple silicon devices, pair this method with a DFU-based restore approach so your entire Mac fleet can be reset quickly and consistently.
Good luck with your testing!